Decorated cookies have become a true trend in recent years. Whether for gifts, parties, celebrations, or simply for fun, these charming treats draw attention with their beauty and creativity. The best part? You don’t need to be a professional pastry chef to make them! With a bit of practice and the right techniques, you can create stunning cookies using royal icing at home.
In this article, you’ll learn how to make decorated cookies with royal icing step by step, from preparing the dough to applying the final details. Get ready to dive into the sweet and colorful world of cookie decorating.
What Is Royal Icing?
Royal icing is a smooth, glossy icing made from powdered sugar, egg whites (or meringue powder), and a small amount of water. It dries hard, making it ideal for creating detailed decorations on cookies. It can be used for outlining, flooding (filling in), adding texture, and even making 3D elements like flowers or letters.
Basic Ingredients for Royal Icing:
- 4 cups powdered sugar (sifted)
- 3 tablespoons meringue powder or 2 egg whites
- 5–6 tablespoons water (adjust for consistency)
- Food coloring (gel-based works best)
- Flavoring (optional, such as vanilla or lemon extract)
Step 1: Making the Perfect Cookie Dough
The base of a decorated cookie should be firm, not overly sweet, and able to hold its shape in the oven. Sugar cookie dough is the most commonly used. Here’s a simple recipe:
Ingredients:
- 1 cup (225g) unsalted butter, room temperature
- 1 cup (200g) granulated sugar
- 1 egg
- 1 tsp vanilla extract
- 1/2 tsp almond extract (optional)
- 3 cups (375g) all-purpose flour
- 1/2 tsp baking powder
- 1/2 tsp salt
Instructions:
- Cream the butter and sugar together until light and fluffy.
- Add the egg and extracts, mixing until combined.
- In a separate bowl, whisk the flour, baking powder, and salt.
- Gradually add the dry ingredients to the wet mixture.
- Form the dough into a disk, wrap in plastic wrap, and chill for at least 1 hour.
- Roll out to 1/4 inch thickness and cut with cookie cutters.
- Bake at 180°C (350°F) for 8–10 minutes. Let cool completely before decorating.
Step 2: Making Royal Icing
Once your cookies are baked and cooled, it’s time to prepare the icing. Use a stand mixer or hand mixer to beat the ingredients until the icing forms stiff peaks. Add water one teaspoon at a time to reach the desired consistency:
- Outline consistency: Thick enough to hold a shape when piped
- Flooding consistency: Thinner and flows smoothly to fill the cookie surface
Separate the icing into bowls to mix different colors, using gel food coloring for vibrant shades that won’t change the texture.
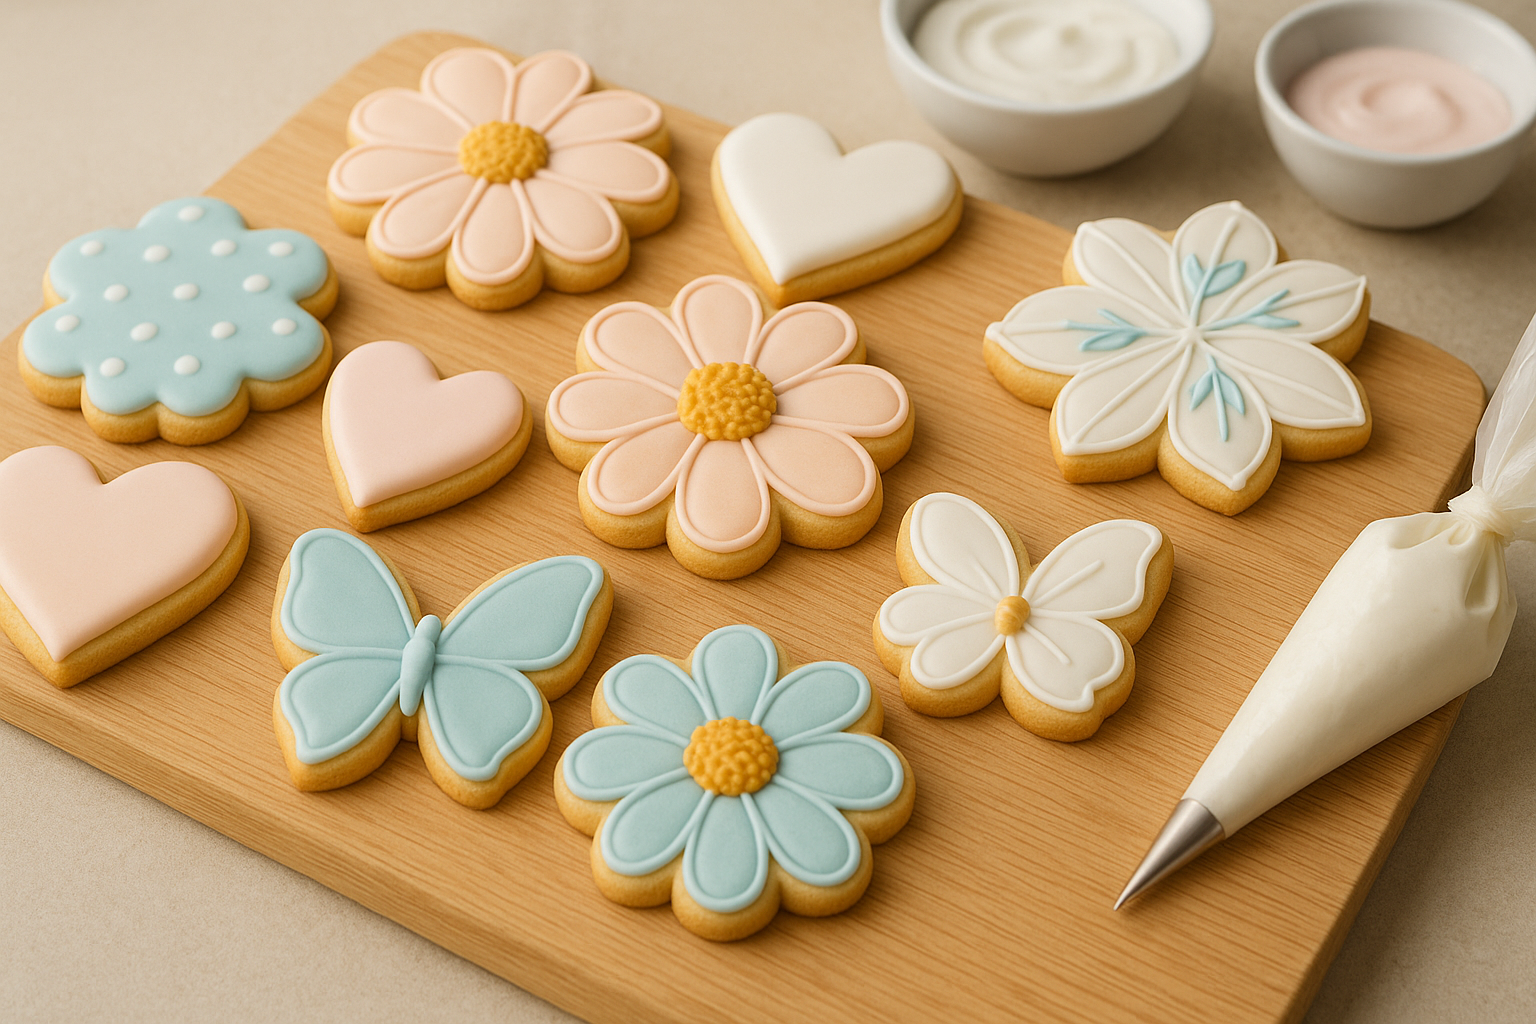
Step 3: Decorating Techniques for Beginners
Decorating cookies with royal icing involves two main techniques: outlining and flooding. Here’s how to do both:
Outlining
Use a piping bag fitted with a small round tip (like #1 or #2). Pipe a border around the cookie to define the area for flooding. Let the outline set for a few minutes.
Flooding
Thin the royal icing with a bit more water until it has a smooth, pourable consistency. Use a piping bag or squeeze bottle to fill the outlined area. Use a toothpick or scribe tool to spread the icing and pop air bubbles.
Let the base layer dry for several hours before adding additional details.
Step 4: Adding Details and Texture
Once your base is dry, you can add more decorations using thicker icing. Try these ideas:
- Dots and hearts: Pipe small dots and drag a toothpick through for heart shapes.
- Lines and patterns: Use contrasting colors to add stripes, zigzags, or plaid.
- Lettering: Use a fine tip and steady hand to add names or messages.
- 3D effects: Let each layer dry before piping more to create a dimensional look.
Be patient—detailed designs require drying time between layers. It’s often best to decorate over two days to ensure the icing sets properly.
Step 5: Drying and Storing the Cookies
Royal icing needs time to dry completely, especially if you plan to package or stack the cookies. Let the decorated cookies air-dry uncovered for 8–12 hours in a cool, dry space.
Storage Tips:
- Store undecorated cookies in an airtight container for up to a week.
- Decorated cookies can be kept for up to 2 weeks at room temperature.
- Do not refrigerate, as the icing can become tacky.
For longer storage, freeze undecorated cookies and decorate them later.
Tools You’ll Need
To start your cookie decorating journey, these basic tools will be helpful:
- Piping bags or squeeze bottles
- Assorted piping tips (especially small round tips)
- Food coloring (gel or powder)
- Toothpicks or scribe tool
- Couplers (to switch piping tips easily)
- Food-safe markers (optional for details)
As you progress, you can explore more advanced tools like airbrush kits, stencils, or edible glitter.
Decorating Themes and Ideas
Decorated cookies can match any event or holiday. Here are some popular ideas:
- Holidays: Christmas trees, Easter eggs, Halloween pumpkins
- Birthdays: Balloons, number cookies, name initials
- Weddings: Floral designs, lace patterns, initials
- Baby showers: Onesies, baby bottles, pastel hearts
- Everyday: Animals, flowers, smiley faces, seasonal fruits
Pinterest and Instagram are great places to find visual inspiration!
Tips for Beginners
- Start simple: Master the basic outline and flood technique before trying advanced designs.
- Practice piping: Use wax paper or parchment to practice designs before decorating cookies.
- Work in small batches: Royal icing dries fast—only prepare what you’ll use right away.
- Keep tools clean: Icing tips can clog easily, so clean them often.
- Be patient: Drying time is essential for clean designs.
Remember, your first cookies don’t have to be perfect. Like any skill, decorating takes practice and creativity.
Why Decorated Cookies Are Worth the Effort
Making decorated cookies is more than just baking—it’s a way to express yourself. Whether you’re preparing treats for a loved one or simply enjoying a relaxing hobby, cookie decorating brings joy and satisfaction.
As your skills grow, you can even turn this hobby into a small business, selling personalized cookies for events and holidays. With social media, it’s easier than ever to showcase your work and attract customers.
Final Thoughts: Sweet Success Awaits
Decorating cookies with royal icing is a fun, rewarding activity that anyone can learn. With the right techniques, tools, and a bit of practice, you’ll be creating stunning cookies that are almost too beautiful to eat. So gather your supplies, roll up your sleeves, and start decorating!