When it comes to desserts, filled chocolate cones—or chocolate cartridges, as they are sometimes called—offer the perfect blend of elegance and indulgence. These treats combine a crisp chocolate shell with a luscious, creamy filling, making them ideal for parties, gifting, or even a cozy night in.
In this article, you’ll learn how to make chocolate cones from scratch, including the cone shells, a variety of filling options, and decorating ideas to take your creation to the next level. Whether you want to serve them at a birthday party, a holiday celebration, or as a gourmet snack, this step-by-step guide will help you craft a dessert that’s as beautiful as it is delicious.
What Are Chocolate Cones?
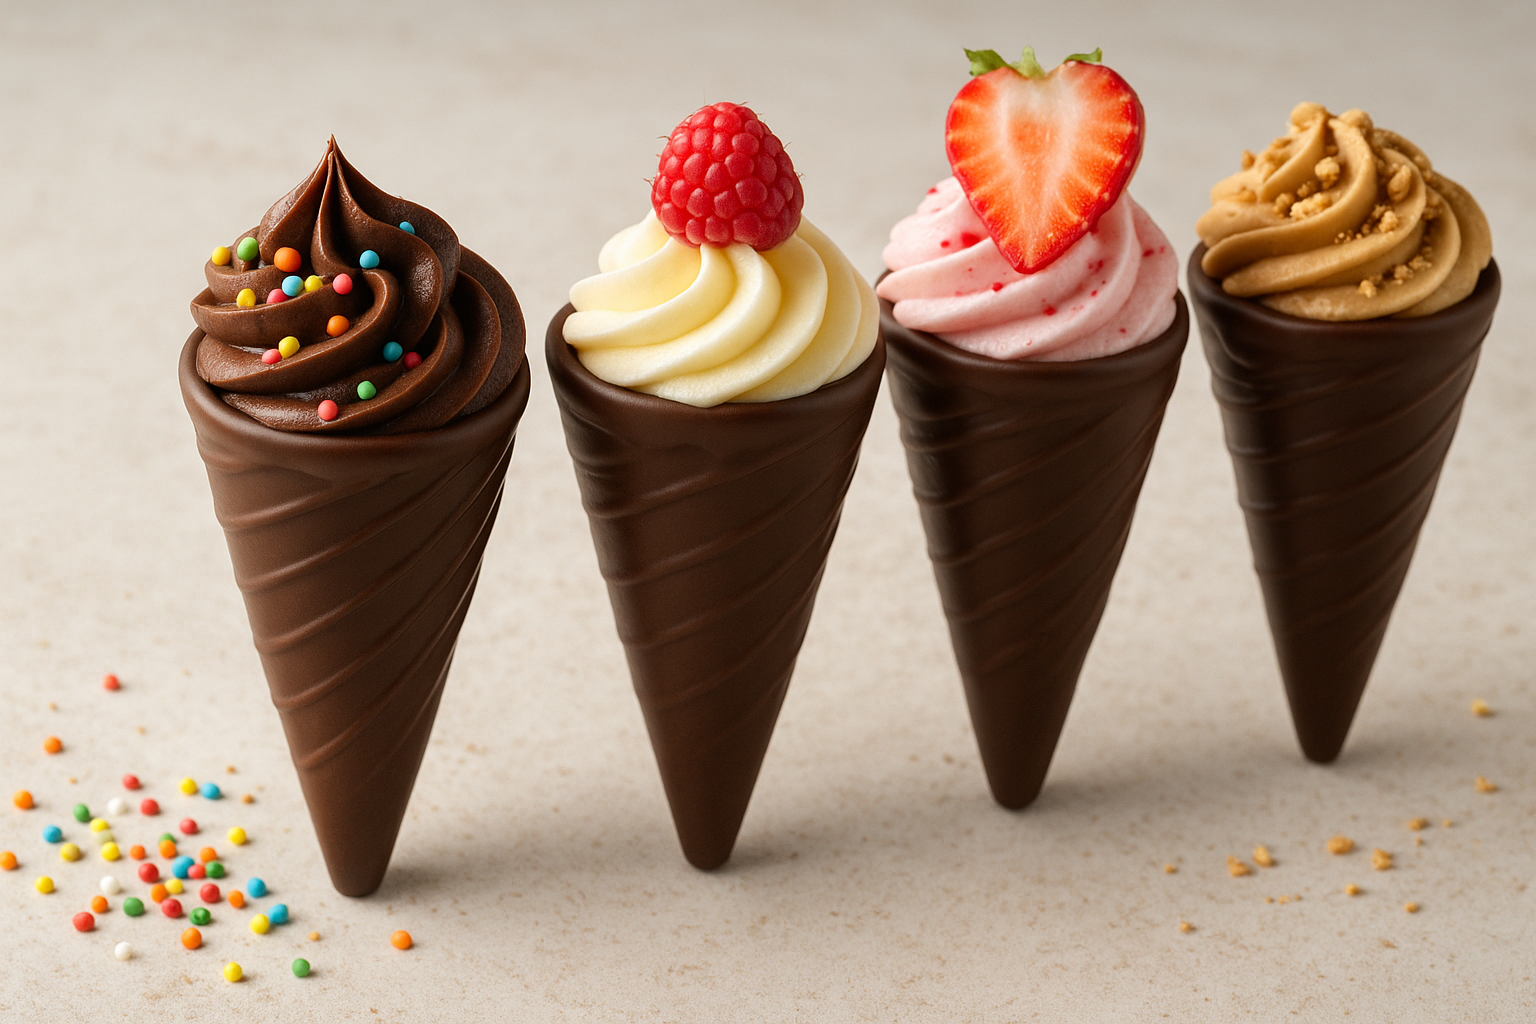
Chocolate cones are cone-shaped shells made of solid chocolate and filled with creams, mousses, ganache, or fruit-based mixtures. They’re visually appealing and incredibly versatile—you can keep them simple or decorate them extravagantly with sprinkles, drizzled chocolate, or edible glitter.
Their structure is inspired by ice cream cones, but instead of a biscuit or wafer base, these are completely edible and made from tempered chocolate.
Tools and Equipment You’ll Need
Before getting started, gather the following tools:
- Cone molds (silicone or metal)
- Piping bags or zip-top bags
- Silicone spatula
- Double boiler or microwave-safe bowl for melting chocolate
- Cooling rack or tray
- Small brushes (for spreading chocolate)
- Candy thermometer (optional, for tempering)
You can find cone molds online or make your own using thick paper or acetate rolled into a cone shape and secured with tape.
Ingredients for the Chocolate Shell
Basic Shell:
- 300g (10 oz) high-quality dark, milk, or white chocolate
Tempering the chocolate will give your cones a shiny finish and satisfying snap. If you’re not comfortable with tempering, you can use compound chocolate or candy melts, which are easier to work with.
Step-by-Step: Making the Chocolate Cones
1. Melt the Chocolate
Use a double boiler or microwave to melt your chocolate. If tempering:
- Heat chocolate to 45°C (113°F)
- Cool it down to 27°C (80°F)
- Reheat slightly to 31–32°C (88–90°F) for dark chocolate
Tempering ensures your chocolate hardens evenly, doesn’t bloom (turn white), and stays firm at room temperature.
2. Coat the Cone Molds
Using a small brush or spoon, coat the inside of each cone mold with a generous layer of melted chocolate. Rotate and tilt the mold to ensure full coverage.
Place the coated molds upside down on a tray lined with parchment paper to let excess chocolate drip out.
Refrigerate for 10–15 minutes until set.
3. Apply a Second Layer
To strengthen the shell, apply a second coat of chocolate once the first layer has set. This helps prevent cracks when unmolding or filling.
Refrigerate again for another 10–15 minutes.
4. Unmold the Cones
Carefully remove the chocolate cones from the molds. If the molds were well-coated and the chocolate was properly set, the cones should release easily.
Place the finished cones upright in a tall glass or cone holder to prepare for filling.
Filling Options for Chocolate Cones
Now comes the fun part—filling your cones! Here are several delicious filling ideas:
1. Chocolate Ganache
Ingredients:
- 200g (7 oz) chocolate (dark, milk, or white)
- 200ml (7 oz) heavy cream
Instructions:
- Heat the cream until it starts to simmer.
- Pour over chopped chocolate and let sit for 2 minutes.
- Stir until smooth and glossy.
- Let it cool and pipe into cones.
Ganache can be flavored with orange zest, mint, or liqueur for variation.
2. Whipped Cream Cheese Filling
Ingredients:
- 200g (7 oz) cream cheese
- 1/2 cup powdered sugar
- 1 tsp vanilla extract
- 1/2 cup whipped cream
Instructions:
- Beat cream cheese and sugar until smooth.
- Add vanilla and fold in whipped cream.
- Pipe into cones and refrigerate until firm.
Great with crushed cookies or fruit on top.
3. Strawberry Mousse
Ingredients:
- 200g (7 oz) strawberries, pureed
- 1/2 cup sugar
- 1 tsp lemon juice
- 1 tsp gelatin
- 1/2 cup whipped cream
Instructions:
- Heat strawberry puree, sugar, and lemon juice.
- Add gelatin, mix well, and cool.
- Fold in whipped cream and pipe into cones.
Fresh, fruity, and light!
4. Peanut Butter Cream
Ingredients:
- 1/2 cup peanut butter
- 1/4 cup butter, softened
- 1/2 cup powdered sugar
- 2 tbsp milk or cream
Instructions:
- Mix all ingredients until smooth and fluffy.
- Pipe into chocolate cones and top with crushed peanuts or a drizzle of chocolate.
A hit with both kids and adults.
Decorating Your Chocolate Cones
Make your cones party-ready with these fun decoration ideas:
1. Drizzle and Sprinkles
After filling, drizzle melted chocolate over the top and immediately add sprinkles, crushed nuts, or mini candies.
2. Fruit Toppings
Top your filled cones with a fresh raspberry, a strawberry slice, or a blueberry for a touch of color and freshness.
3. Edible Glitter or Gold Dust
Lightly dust the tops with edible glitter or shimmer powder for a classy finish.
4. Dipped Edges
Dip the open end of the cone in chocolate, then roll in crushed nuts or coconut before adding the filling.
Creative Flavor Combinations
Here are some tried-and-true combinations you can experiment with:
- Dark chocolate shell + mint mousse
- Milk chocolate shell + caramel filling
- White chocolate shell + passion fruit mousse
- Dark chocolate shell + espresso cream
- Milk chocolate shell + cherry cheesecake filling
Match flavors with your event’s theme or season—fresh berries in spring, spiced creams in winter, or tropical fruits for summer.
When and How to Serve Chocolate Cones
Filled chocolate cones are incredibly versatile. Here’s how to make the most of them:
Occasions:
- Birthday parties
- Weddings or bridal showers
- Holidays like Easter and Christmas
- Dinner parties
- Edible gifts or party favors
Serving Tips:
- Use a cone stand or a plate filled with sugar or rice to hold them upright.
- Serve chilled for best texture.
- Label with small signs if offering multiple flavors.
If you’re making them in advance, refrigerate the cones after filling, but be careful with high-moisture fillings—they may soften the chocolate over time. It’s best to fill them within a few hours of serving.
Making Ahead and Storing
Unfilled Chocolate Cones:
- Store in an airtight container at room temperature for up to a week.
- Keep away from heat or direct sunlight.
Filled Cones:
- Store in the fridge for up to 24 hours, depending on the filling.
- Avoid freezing, as condensation can cause the chocolate to crack.
If transporting, pack the cones carefully using paper cups or foam padding to protect their delicate shape.
Final Treat: A Gourmet Dessert Within Reach
Filled chocolate cones are a delightful blend of creativity, flavor, and elegance. They’re surprisingly easy to make with just a few tools and basic ingredients, and the variations are endless. Whether you’re filling them with rich ganache, fruity mousse, or peanut butter cream, they’re sure to impress.
So, roll up your sleeves, melt that chocolate, and start crafting your own edible cones of happiness. They’re not just desserts—they’re showstoppers.