Cupcakes are a beloved treat that offer not only delightful flavors but also endless opportunities for creativity in decoration. Whether you’re baking for a birthday, a wedding, or simply a cozy afternoon at home, learning how to decorate cupcakes like a professional can take your baking game to the next level.
In this comprehensive guide, you’ll learn how to decorate cupcakes from start to finish, including tools you’ll need, techniques to master, and insider tips for that picture-perfect finish.
Why Cupcake Decoration Matters
While taste is undoubtedly the most important part of any baked good, visual appeal plays a major role—especially when you’re looking to impress guests or sell your creations. A beautifully decorated cupcake can stand out at events, be more enticing to customers, and even bring a sense of personal satisfaction. Decoration is where baking meets art.
Essential Tools for Cupcake Decorating
Before diving into the decorating process, make sure you have the right tools. Here’s what you’ll need to get started:
- Piping bags: Disposable or reusable.
- Piping tips: Start with a few versatile ones like the Wilton 1M (for rosettes), 2D (for ruffles), and round tips for writing or borders.
- Offset spatula: Great for spreading frosting smoothly.
- Cupcake corer or knife: To fill cupcakes if desired.
- Food coloring gels: More vibrant and less watery than liquid food coloring.
- Sprinkles, edible glitter, and toppers: For the finishing touch.
Step 1: Bake the Perfect Cupcake Base
Professional-looking cupcakes start with a solid foundation. Here are a few quick tips:
- Use room-temperature ingredients for smoother batter and better texture.
- Do not overmix the batter—this can make the cupcakes dense.
- Use an ice cream scoop to evenly portion the batter into cupcake liners.
- Check for doneness by inserting a toothpick into the center. If it comes out clean, they’re ready.
Let them cool completely before decorating. Applying frosting on warm cupcakes will cause it to melt and slide off.
Step 2: Choose the Right Frosting
Different types of frosting work better for different effects. Here are a few popular options:
Buttercream Frosting
Creamy, sweet, and easy to color or flavor, buttercream is the most versatile frosting.
Basic buttercream recipe:
- 1 cup unsalted butter (room temperature)
- 3–4 cups powdered sugar
- 2–3 tablespoons milk or heavy cream
- 1 teaspoon vanilla extract
- Pinch of salt
Beat the butter until creamy, gradually add powdered sugar, and adjust the texture with milk or cream. Add flavor or color as desired.
Cream Cheese Frosting
Tangy and rich—perfect for red velvet or carrot cupcakes. It tends to be softer, so it’s best used for simple swirls rather than intricate piping.
Ganache or Whipped Cream
For a luxurious finish, ganache gives a glossy look, while whipped cream is light and fluffy. Note: whipped cream is best for immediate serving as it can melt.
Step 3: Coloring and Flavoring the Frosting
Use gel-based food coloring for vibrant hues without thinning your frosting. A toothpick helps control the amount—just dip it into the gel and swipe into the frosting.
Flavoring ideas:
- Fruit purees: Strawberry, raspberry, lemon.
- Extracts: Almond, mint, coconut.
- Spices: Cinnamon, nutmeg, or pumpkin spice for seasonal twists.
Be careful not to add too much liquid flavoring, as it can affect consistency.
Step 4: Filling Your Cupcakes (Optional but Impressive)
Adding a filling adds an unexpected surprise and layers of flavor.
How to fill:
- Use a cupcake corer or a small knife to remove a small section from the center.
- Add filling with a spoon or piping bag: jam, caramel, ganache, lemon curd, or cream.
- Replace a small part of the removed cake on top to “seal” the filling.
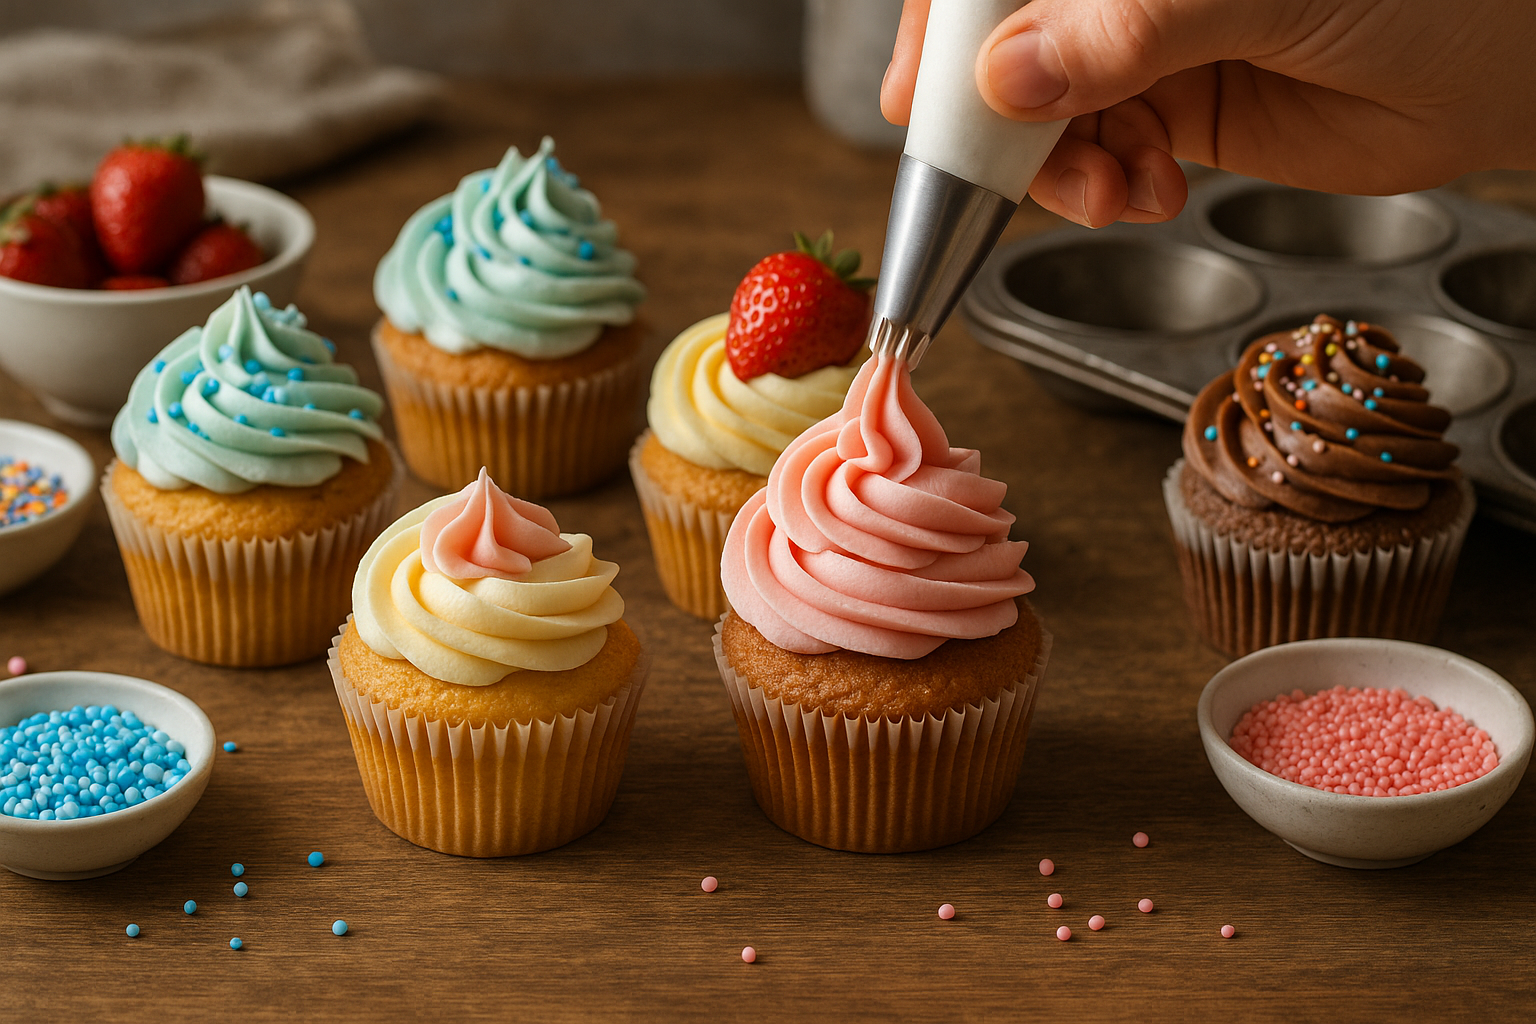
Step 5: Mastering Piping Techniques
Now for the fun part! Piping takes practice, but once you get the hang of it, you’ll be amazed at how professional your cupcakes look.
Basic Techniques:
- Rosette: Use a star tip (like 1M), start in the center, and pipe in a circular motion outward.
- Swirl: Pipe from the outer edge inward, spiraling upward to create height.
- Ruffle: Hold the bag at a 90° angle and make small zigzag motions with a petal tip.
- Drop Flowers: Use a closed star tip and press down, lift, and twist.
Tips for Piping Success:
- Don’t overfill the piping bag—half to two-thirds full is ideal.
- Hold the bag straight up, unless the technique requires an angle.
- Practice on parchment paper first if you’re unsure.
Step 6: Add Creative Toppings
Here’s where you can let your imagination run wild. Consider your theme and the audience when choosing toppings.
Ideas:
- Sprinkles or sanding sugar: Instant sparkle.
- Fresh fruit: A single berry or slice can look elegant.
- Mini cookies or candy: Adds fun and texture.
- Edible flowers: Dried rose petals, violets, or pansies for a sophisticated touch.
- Themed toppers: Flags, fondant shapes, or custom-made paper toppers for events.
Step 7: Creating Themed Designs
Thinking about a special occasion? Here’s how to tailor your cupcakes to different themes:
For Birthdays:
- Use bright colors and lots of sprinkles.
- Add candles or character toppers.
For Weddings:
- Keep it elegant with white, cream, and pastel tones.
- Use edible pearls and delicate piping.
For Holidays:
- Halloween: Orange frosting, spooky toppers, or candy eyes.
- Christmas: Red and green swirls, candy canes, or holly fondant shapes.
- Easter: Pastel shades, bunny ears, or mini chocolate eggs.
Step 8: Storage and Presentation
Decorated cupcakes should be stored properly to maintain freshness and appearance.
- Short-term: Keep in an airtight container at room temperature for up to 2 days.
- Long-term: Store in the fridge, especially if using cream cheese or whipped cream frosting. Bring to room temperature before serving.
For presentation:
- Use a cupcake stand for height.
- Decorate the tray with flowers, leaves, or matching tableware.
- Consider individual boxes or wraps for gifting or selling.
Common Mistakes to Avoid
Even experienced bakers can make mistakes. Here are a few pitfalls to watch out for:
- Frosting too runny or stiff: Always adjust with sugar or milk for the right consistency.
- Cupcakes too warm when frosting: Let them cool completely.
- Uneven cupcakes: Fill liners consistently and avoid opening the oven mid-bake.
- Overcrowding with toppings: Less is often more.
Final Touches for Professional Quality
To truly give your cupcakes that professional finish:
- Wipe down the edges of the cupcake liners for a clean look.
- Add a dusting of edible glitter or shimmer.
- Match the colors to your event theme or brand.
Take photos with good lighting and from multiple angles—it’s great for social media, portfolios, or listings if you plan to sell.
From Hobby to Business?
If decorating cupcakes becomes more than just a fun pastime, consider monetizing your skill:
- Sell at local markets or online.
- Offer themed boxes for holidays.
- Take custom orders for birthdays and events.
- Teach classes or workshops on cupcake decoration.
The Sweet Satisfaction
There’s something truly special about turning a simple cupcake into a mini masterpiece. With the right tools, a bit of practice, and plenty of creativity, you’ll soon be decorating cupcakes like a professional baker.
The next time you bake, take your time, experiment with techniques, and enjoy the process. Each swirl, sprinkle, and finishing touch adds your personal signature to your sweet creations.